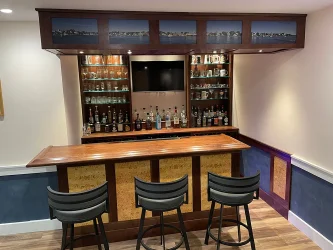

Our radius corners make great complements to our bar top kits, giving you an overall polished, finished look for your home or commercial bar.
Installing the radius corner with the bar top kit may look complicated, but it’s actually pretty easy if you follow our step-by-step directions!
When installing one of our bar top kits together with a bar rail radius corner it is best to mark and cut the plywood sub top radius first using the templates provided. The prescribed measurements are 7-9/16″ for the 6″ and 13-9/16″ for the 12″ radius.

Next, after studying the bar top kit installation instructions provided, miter or herring bone cut your bar top planks as required to make the corner and secure temporarily.

Then, mark the two front 6″ wide bar top planks for either 6″ or 12″ radius, cut and install temporarily to check fitment of the radius corner.
If no further adjustments are needed, proceed to final installation of the bar top kits and bar rail moldings as outlined in our instructions.

Building your own bar can give you the professional, beautiful results you want with high-quality hardwood bar parts from Hardwoods Incorporated.
We carefully select the wood we use for our bar rails, bar tops, and other bar parts, milling them all in our shop in the United States.
Need help building your bar? Email us at info@hardwoodsincorporated.com, or call us at (301) 665-9505 or (240) 285-0565.
Thank you for choosing Hardwoods Incorporated.
"
"
Hi Paul,
Our bar turned out really nice!. Three more coats of polyurethane really did the trick!
Thank you again for such a great product.
Wil H. – Purcellvile, Virginia
0407/2025
Hey Paul,
Thanks for all your help! Bar top and radius corners turned out great!
03/14/2025

16134 Business Parkway
Hagerstown, MD 21740
© 2024 Hardwoods Incorporated
All Rights Reserved.
Our team has over 40 years of experience in actually building commercial bars, home bars, back bars, pub rails and related interior construction. We are passionate about every step of the process involved in crafting a custom bar, from selecting the right bar rails and parts, to designing and constructing your bar for optimal comfort and style.

Please check back soon!


Offer Valid
Dec 19 thru Dec 31, 2024
Use Code: DEC10OFF

OFFER EXCLUDES: TAXES, SHIPPING, CLOSEOUTS & SPECIALS. OFFER VALID AT TIME OF PURCHASE ONLY.